How to Create a Mask for Images in Figma: A Step-by-Step Guide

Want to enhance the design of your website or application? Have you utilized the power of mask in Figma feature? It enables you to build stimulating layouts and shapes and creates a sense of movement and depth. Furthermore, it seamlessly integrates with other design tools like Blending modes, Boolean Operations, and vector networks to build elaborate and fascinating effects.
In addition to mastering image masking in Figma, we’ll also explore the seamless process of converting your Figma designs to HTML, allowing you to bring your creations to life on the web
What is the Mask in Figma?
A mask is a piece of an image hidden from view. A mask in Figma feature is used to hide a vector portion of the image or object. This feature is used for making a region transparent in an image or offering a cutout appearance to an image.
Two types of masks are available in Figma – raster masks and vector masks.
- Vector masks – it is generated by using vector objects.
- Raster masks- it is generated by using raster images.
Process of Masking in Figma
You can mask in Figma by the following two methods.
Method 1: Masking Objects
Step 1: Creating a New Design File
To create a new project, launch Figma and click the “New Design File” option.
*For an existing file, select the option “Open the File.”
Opening file in Figma
Go to File > Place Image > Drag into the canvas to import the image as per the required size.
Now create the object or shape that you want to mask with the image.
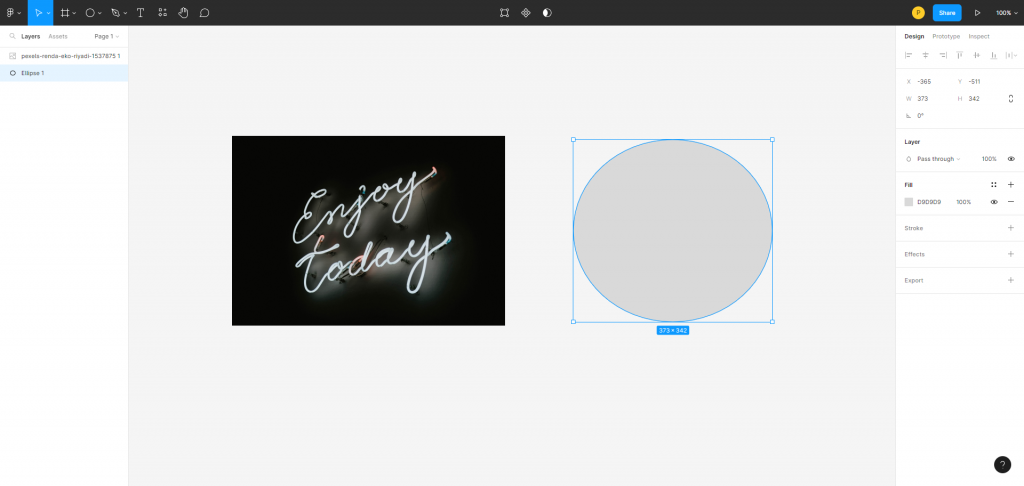
Step 2: Creating a shape in Figma
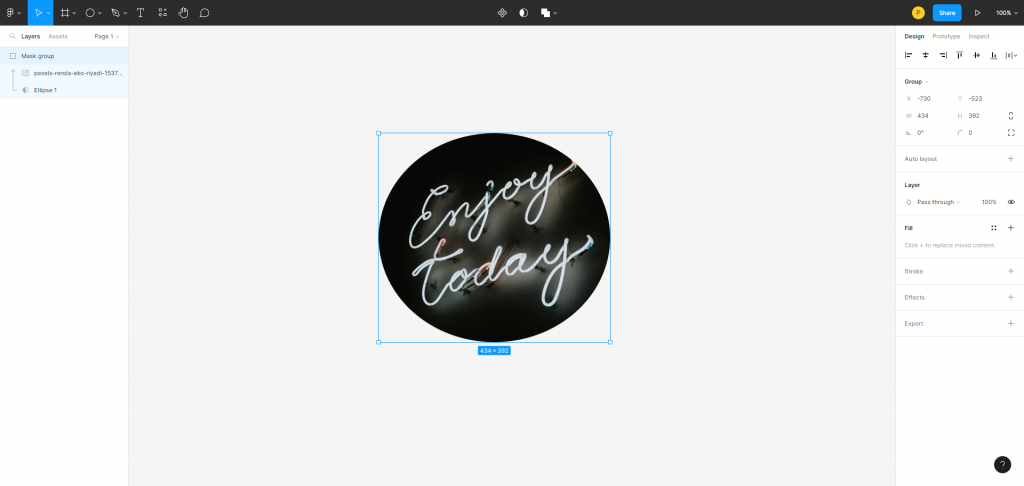
Masking the image into the desired shape needs the created object to be put under the image. To perform this task, visit the layer panel available on the left side upper corner, and place the shape layer under the image.
Using shape as a mask
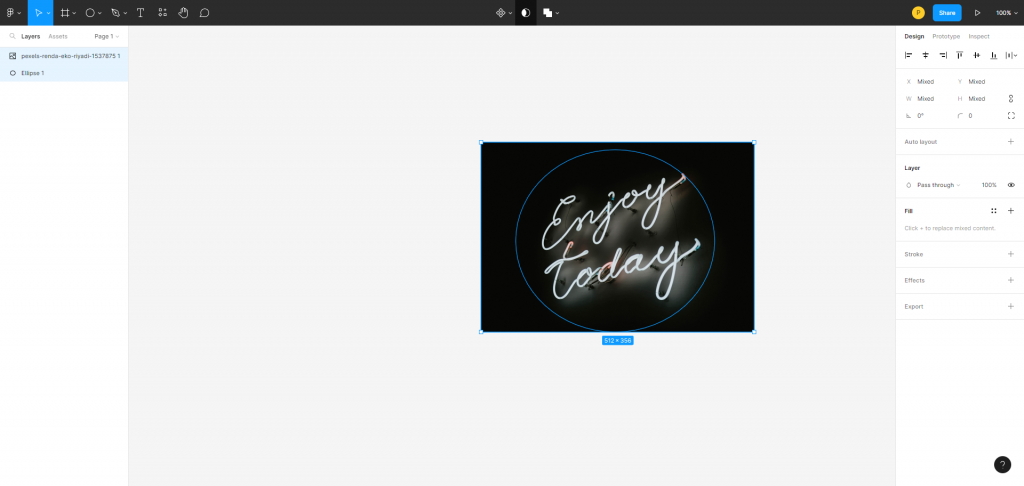
Select both layers and right-click, select the option “Use As Mask” and execute the process.
GET LIVELY & RESPONSIVE WEB PAGES WITH OUR FIGMA TO HTML CONVERSION !
Contact us with detailed information about the project and get a quote NOW!!!!.
Method 2: Masking Text as a Layer Mask
Step 1: Select the “text” tool from the toolbar to draw a text box on the canvas. Now, click and drag to enter text.
Step 2: Set the text size: 100 points; text font: Black font
Step 3: Use the “Image” tool to import a picture from local files stored on the desktop.
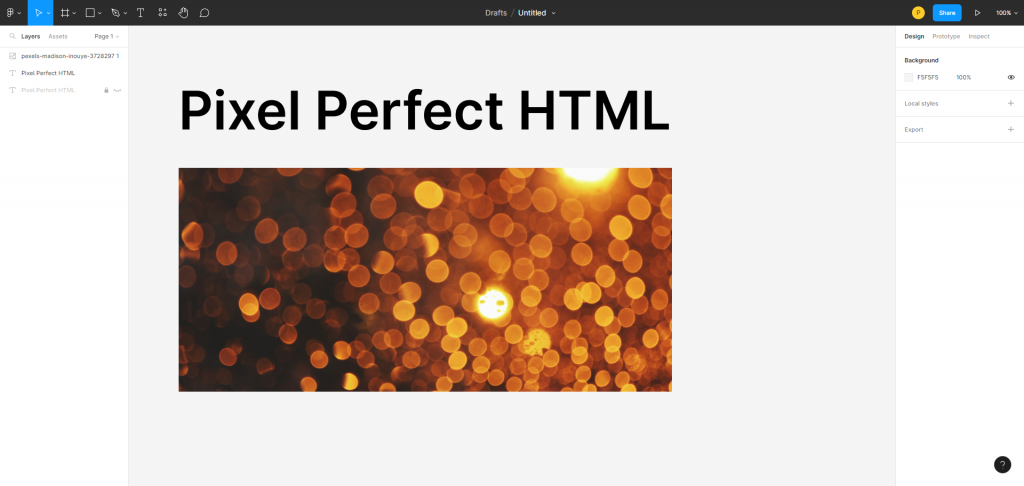
Step 4: Set image layer size: 500 pixels (width) and 500 pixels (height). Now drag the image layer onto the text layer. The image must be placed above the text as per the rules of hierarchy.
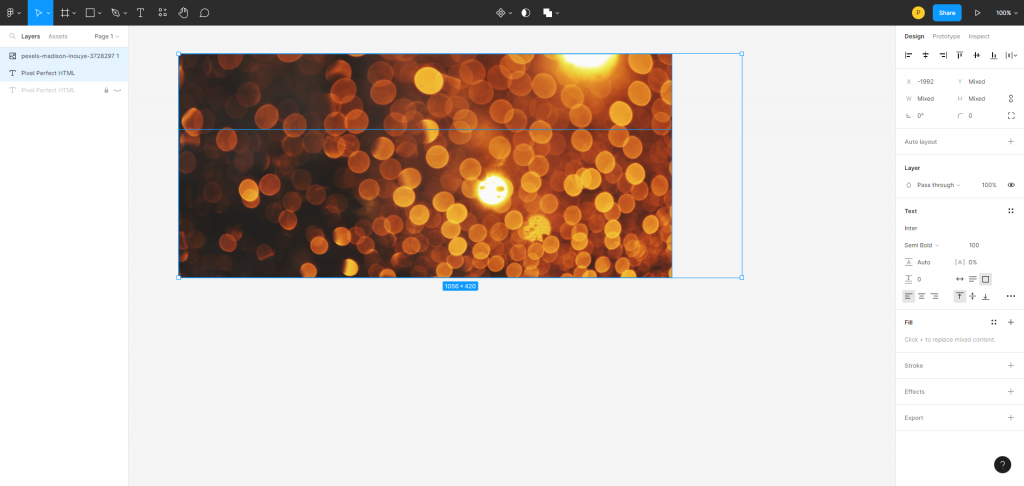
Step 5: To mask the text, select the image and text layers and apply the “Use as mask” tool available in the top-left toolbar.
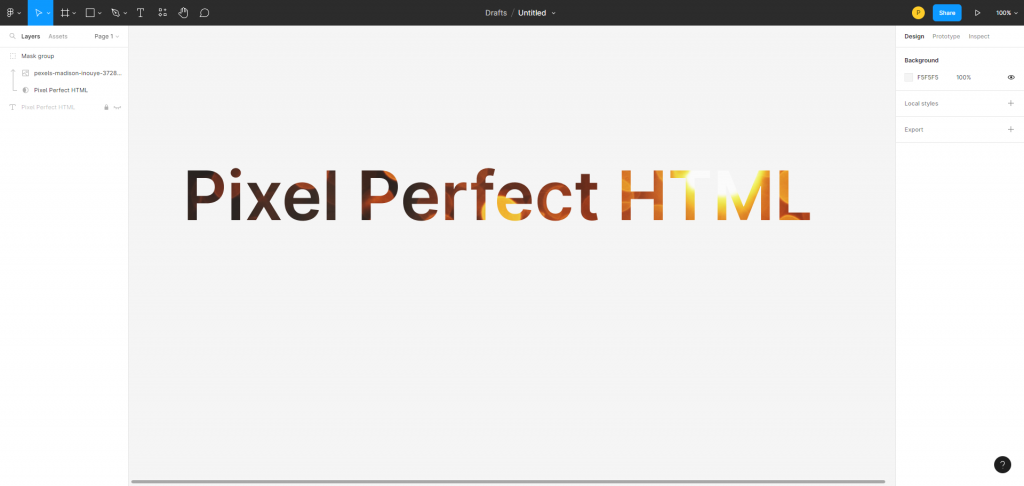
PRO TIP: A mask in Figma feature is used to hide or display portions of an image or text. However, alignment and spacing should be carefully adjusted after applying the mask; else the object can easily get misaligned and will create problems with the design layout.
Further reading
If you’d like to explore more of the world of design, then these articles might interest you:
Conclusion
We hope you found this tutorial helpful on how to mask text and shape. To learn and collaborate better on Figma we have more tutorials coming up, so make sure to check out our space regularly.